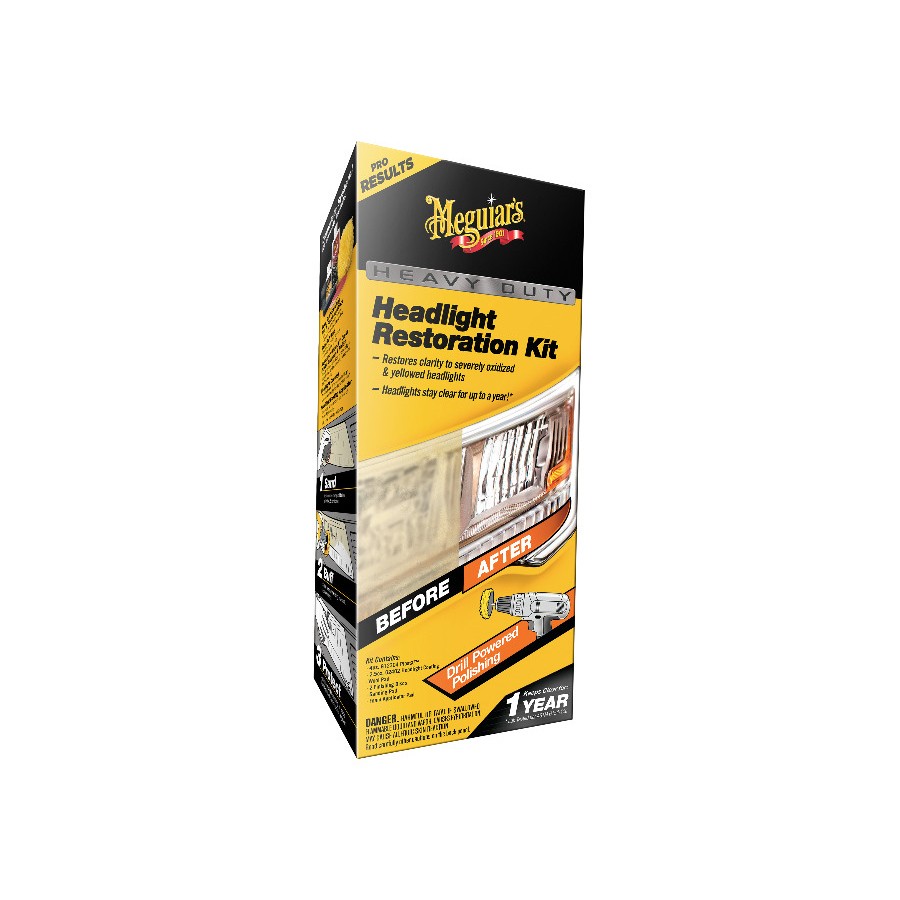
Meguiar's Heavy Duty Headlight Restoration Kit
More about the product
Meguiar's Heavy Duty Headlight Restoration Kit
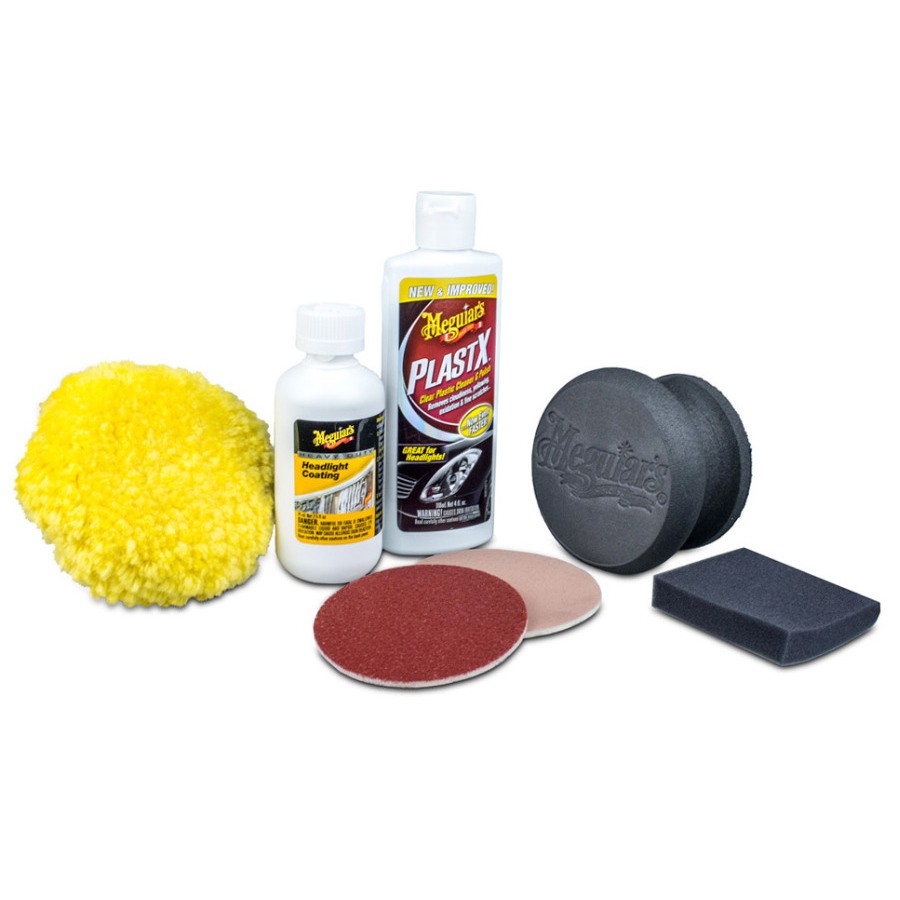
Meguair's complete kit for refurbishing heavily oxidized, yellowed and scratched headlights. You don't even have to worry about strong oxidation and dimming of the lights. Thanks to this set, you can renovate any clear plastic surface easily and efficiently. Everything you need to renovate is already included in this kit. You can work either by hand or by machine using a drill, into which you clamp the unique Meguiar's polishing attachment, which is part of the set.
Heavily oxidized, yellowed and scratched headlights reduce safety when driving in poor lighting conditions. However, the renovation of such headlights does not have to represent an expensive visit to a professional - you can now do everything yourself! Meguiar's Heavy Duty Headlight Restoration Kit contains everything you need to grind, polish and protect your headlights - easily, gently and effectively.
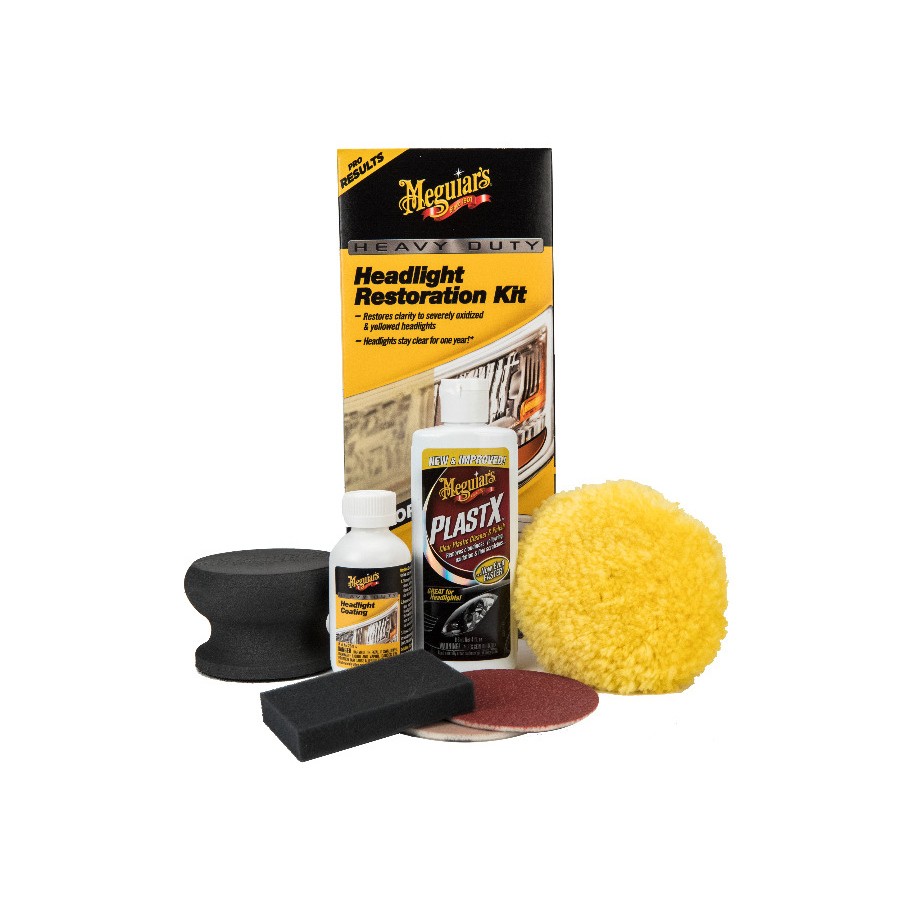
The set includes:
G12304 Meguiar's PlastX, 118 ml
- Polisher intended for polishing surfaces made of clear plastic, polycarbonate and Plexiglas.
- It quickly and easily restores a top-notch look and shine.
- Removes light scratches, oxidation, stains and gives the surface a high gloss.
- Ideal for use by hand or by machine, and also after sanding the lights with sanding pads or discs.
G2402 Meguiar's Headlight Coating, 74 ml
- Special coating (extremely durable protection) for headlights and clear plastics.
- Easy application and long-lasting protection.
- Delays re-oxidation, tarnishing and yellowing by up to 1 year!
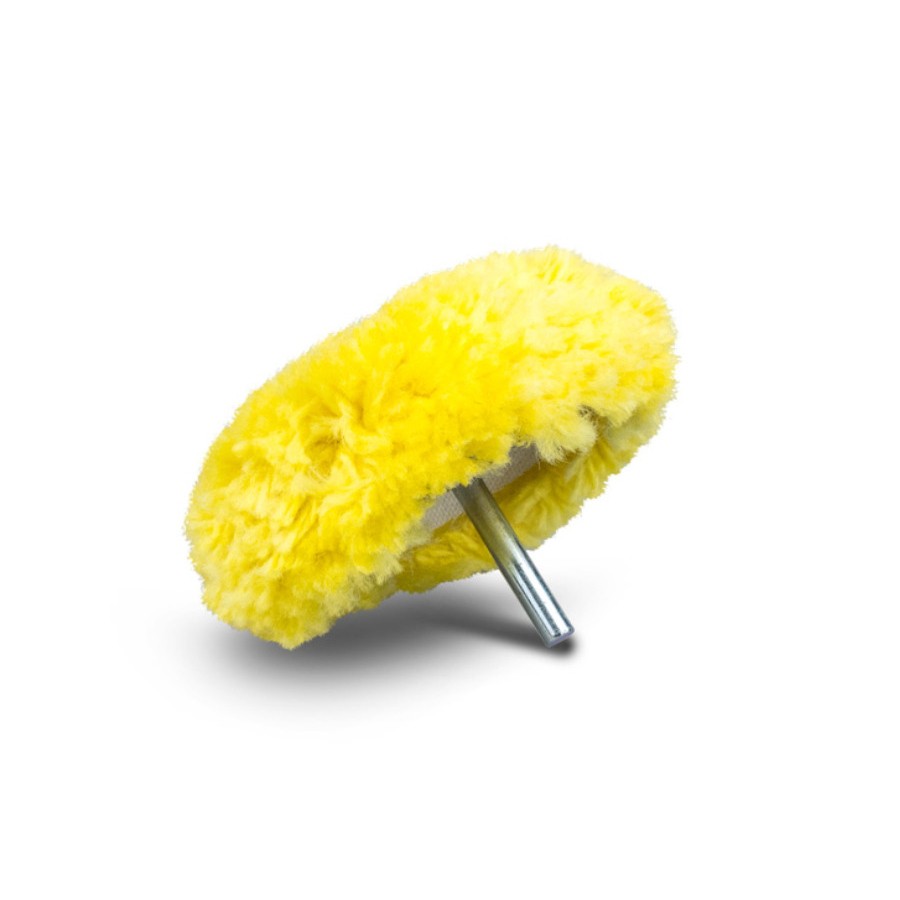
Polishing attachment for drill
- Wool attachment for attachment to the drill.
- In combination with PlastX clear plastic polish, it restores transparency to all clear plastic surfaces.
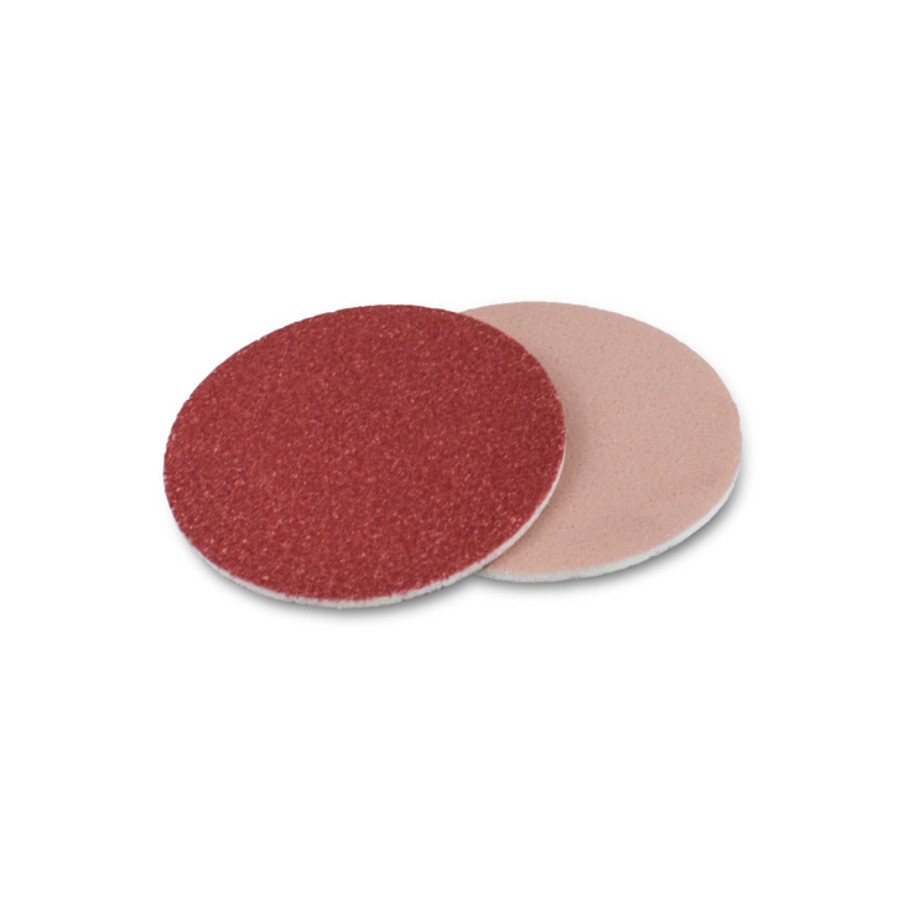
Abrasive discs, 2 pcs
- Grit 1000 and 3000 for gentle removal of strong defects in clear plastics.
- To be applied using the enclosed abrasive applicator.
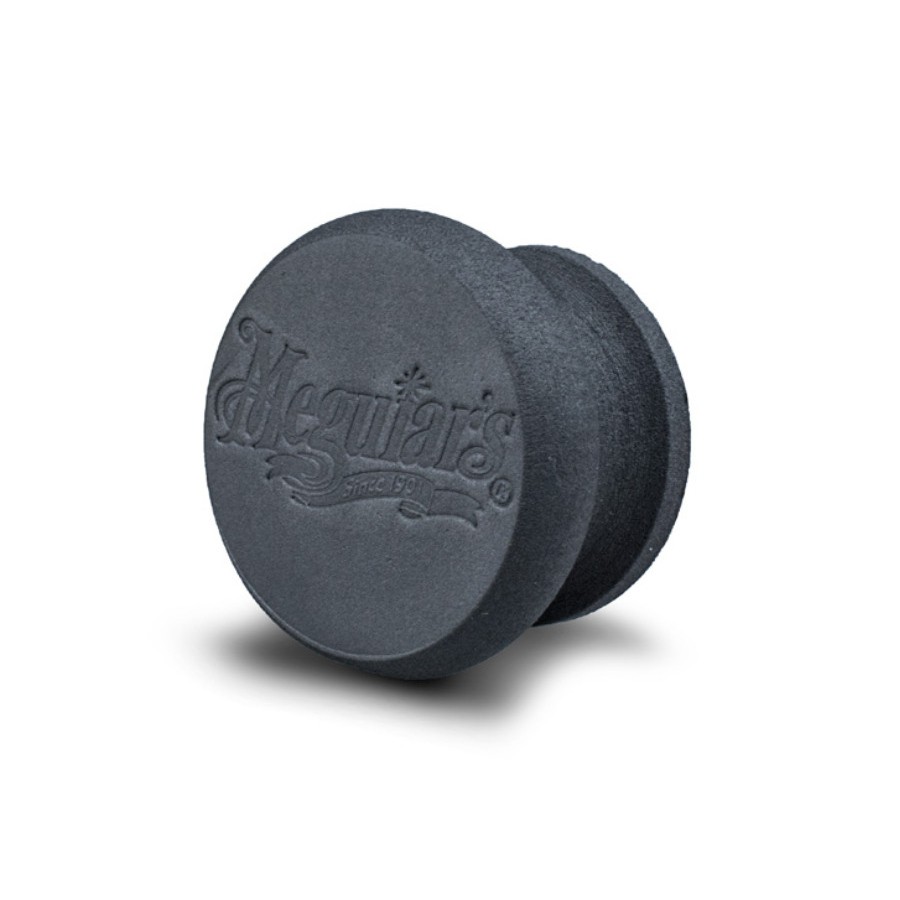
Applicator for manual sanding
- Foam, ergonomically shaped applicator for comfortable and efficient manual sanding.
- Velcro with a diameter of 75 mm enables the attachment of grinding wheels.
- The soft design perfectly copies the contours of the headlights and enables uniform sanding of the damaged surface.
Applicator for applying Headlight Coating
- Foam applicator for easy application of protective coating on lights.
- Thanks to the cellular structure, it spreads the coating evenly over the surface of the headlight.
How to correctly choose a suitable headlight renovation kit?
- G2960 Meguiar's Basic Headlight Restoration Kit
- Step 1 - manual sanding
- Step 2 - manual polishing
- Intended for the removal of: LIGHT DEFECTS - light oxidation, beginning yellowing, light matting, light scratches.
- Application: manually (no need to use devices).
- Advantages: low price, quick manual application - a basic kit for renovating headlights.
- G2970 Meguiar's Perfect Clarity Headlight Restoration Kit
- Step 1 - chemical cleaning and matting of the surface
- Step 2 - long-term UV protection (spray coating)
- Intended for removing: MEDIUM DEFECTS - light and medium oxidation, yellowing, light and medium scratches.
- Application: by hand (step 1 can be applied using Meguiar's DA Power System)
- Advantages: very easy and quick manual application, extreme protection, also suitable for professional use - the most versatile set for renovating headlights.
- G2980 Meguiar's Heavy Duty Headlight Restoration Kit
- Step 1 - manual sanding
- Step 2 - machine polishing
- Step 3 - long-term UV protection (liquid coating)
- Intended for the removal of: STRONG DEFECTS - strong oxidation, yellowing and matting as well as deeper scratches
- Application: manual (grinding and protection), machine (polishing).
- Advantages: a set for the most damaged headlights, also suitable for professional use.
Headlight renovation procedure:
- Basic instructions :
- Always work in the shade and on a surface that is cool to the touch. Never work in direct sunlight! Shake all liquid products well before use! Use only high-quality accessories (foam applicators, microfiber cloths) to apply and wipe off products. Follow the instructions for use. Please contact your dealer if you have any questions.
- Always work in the shade and on a surface that is cool to the touch. Never work in direct sunlight! Shake all liquid products well before use! Use only high-quality accessories (foam applicators, microfiber cloths) to apply and wipe off products. Follow the instructions for use. Please contact your dealer if you have any questions.
- Notice:
- Not intended for use on LCD displays, navigation devices, plastic and mica convertible top windows and motorcycle shields.
- Not intended for use on LCD displays, navigation devices, plastic and mica convertible top windows and motorcycle shields.
- Method:
- Clean the lights with glass cleaner and a clean microfiber cloth. Seal the surrounding parts of the body with masking tape.
- Attach a 1000-grit sanding wheel to the included manual sanding applicator. Moisten its working surface and keep it moist during work either by soaking it in a glass of water or spraying it with water from a spray bottle (not included in the package). Sand the surface of the headlight with smooth, light horizontal strokes. For sufficient lubrication, frequently moisten the surface of the headlight and the grinding wheel. Sand lightly until the light has a uniform matte appearance. Afterwards, wipe the surface of the headlight dry with a microfiber cloth.
- Replace the sanding wheel with a 3000 grit wheel. Moisten its work surface and keep it constantly wet during work either by soaking it in a glass of water or spraying it with water from a spray bottle (not included). Sand the surface of the headlight with smooth, light vertical strokes. For sufficient lubrication, frequently moisten the surface of the headlight and the grinding wheel. Sand lightly until the light has a uniform matte appearance. Afterwards, wipe the surface of the headlight dry with a microfiber cloth.
- Attach the yellow Meguiar's polishing attachment to the drill. We recommend using an electric drill with a speed range of 1200 - 2500 RPM.
- Apply a dime-sized drop of PlastX polish to the polishing attachment, place the entire working surface of the attachment on the surface of the headlight and turn on the drill. Be aware of the impact that the drill can give to the rotating attachment. Work in slow, horizontal strokes on smaller sections of the headlight. Do not work with high pressure and do not tilt the attachment - make sure that it works over the entire surface. You can apply PlastX at any speed of the drill. The higher speed provides stronger correction and polishing, but it can be more difficult to keep the bit flat on the surface. Therefore, we recommend adjusting the speed as needed.
- Wipe off the remains of the product without unnecessary delay with a microfibre cloth so that they do not dry on the surface. Repeat the procedure if necessary. Finally, polish the headlight surface with PlastX polish applied with a microfiber cloth to achieve a final finish.
- Clean the lights from the remains of the polish with a glass cleaner and wipe dry with a microfiber cloth.
- Make sure the headlight surface is clean and dry. Apply the protective coating to the enclosed gray applicator. Apply the coating in vertical, overlapping strokes to the entire surface of the headlight, then apply horizontally to cover the entire surface of the headlight. Repeat the process on the other headlight. The coating is dry to the touch after approx. 15 minutes, it reaches full hardening after 24 hours. We recommend that you keep the headlight surface clean and dry until the coating is fully cured (24 hours after application).
| Catalog number | G2980 |
| Brand | Meguiar's |
| Links | Official web presentation |
Product comments
Evaluation
You might also be interested
 Quick previewa revolutionary kit for reviving headlights49,58 EURIn stockFlexipads Glacier Headlight Restoration Kit - Replacements 75
 Quick previewset for polishing plastic surfaces and lights - spare items51,63 EURIn stockMeguiar's PlastX Clear Plastic Cleaner and Polish (296 ml)
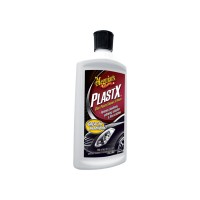 Quick previewrestoration and shine of plastics13,71 EURIn stockSonax headlight renovation kit
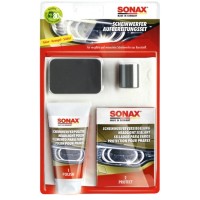 -20 %Quick previewheadlight renovation kit - 75 ml25,30 EUR
 -20 %Quick previewprofessional means for renovating headlights23,97 EUR
 -20 %Quick previewceramic headlight protection, 10 bags34,63 EUR
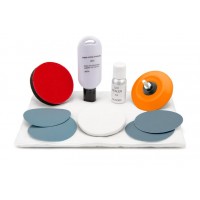 Quick previewset for polishing plastic surfaces51,63 EURIn stockDamaged cap with large Ahifi logo (khaki)
 -82 %Last piecesQuick previewcap with large Ahifi logo, khaki2,88 EUR